Bottling
When you are ready to bottle either a partial batch or a complete one, go to the appropriate Batch Detail layout and add a new Management Event. Select "Bottle" from the Event popup. A dialog will remind you to be sure you have added all expenses relating to the batch, if you are tracking costs, and you will be forwarded to the "Bottle Quantity" dialog.
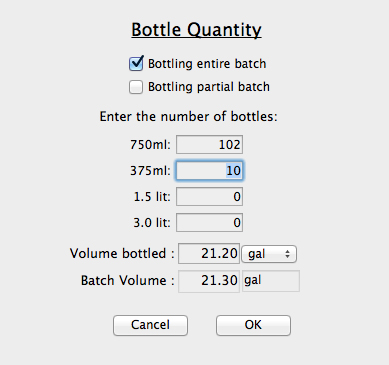
Enter the number of each size bottle that you filled, and check the box that corresponds to how much of the batch you completed. Click OK and you will return to the Batch Detail, with the quantities of bottles now visible.

Clicking Validate will bring up the "Add Bottles to Cellar" dialog that will allow you to add a name for the wine (2 lines).
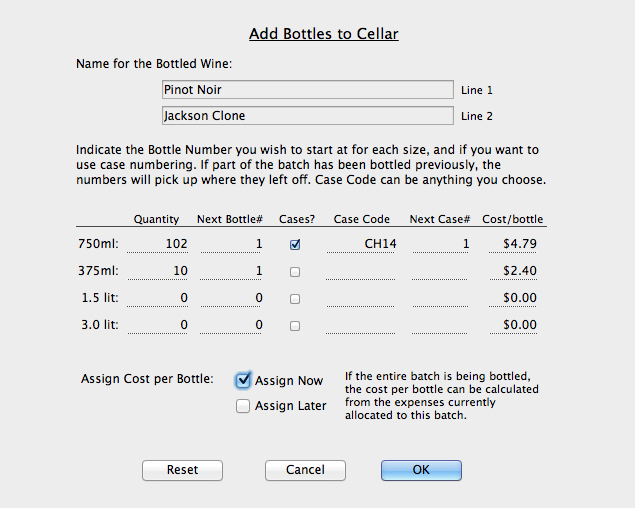
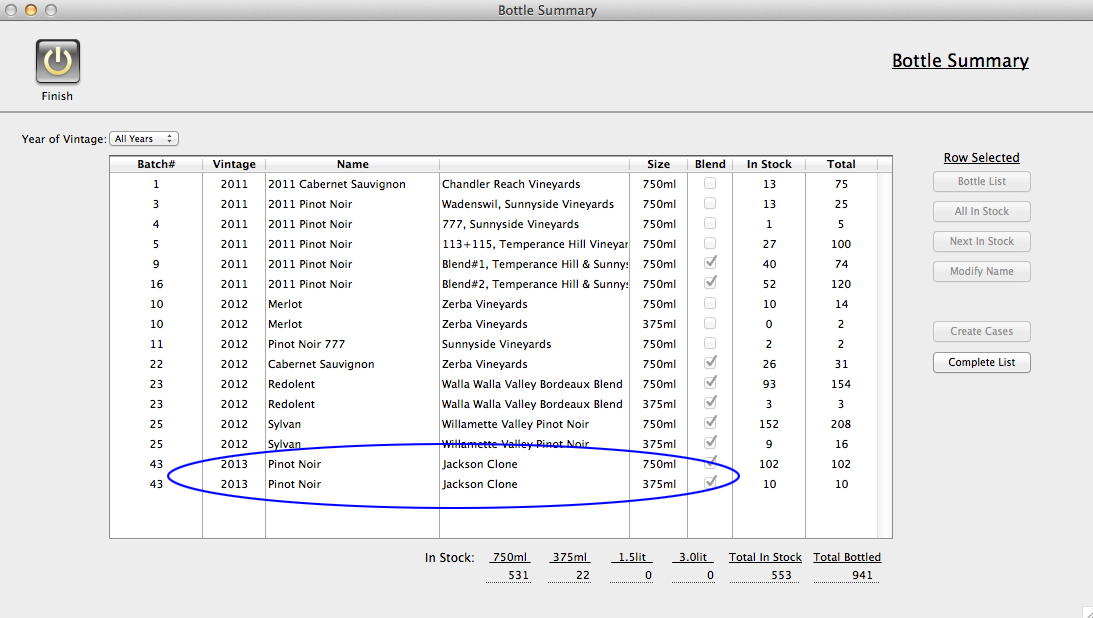
Bottle numbering begins at 1 if this is the first run from the batch, otherwise it picks up from the last number of the previous bottling. If you want to organize your bottles in cases, click "Cases" next to the size and enter any Case Code you'd like associated along with a starting number for the cases to increment from. You can assign costs to the bottles or do it later by checking the appropriate box at the bottom. Click OK when you are sure everything is correct, be careful, most of the information is difficult to modify once the bottles have been written into your data. You will see a confirmation that the bottles have been successfully added you the Inventory. If you go Mode/Bottles, the new bottles will now show up in the Bottle Summary, and any cases likewise in the Case Summary.